2/17/2013

Refurbishing a Trailer Part IV

We spent this day getting the second leaf spring mounted, and lined up as close to the first one as we could.
We had to make a front bracket that was taller as the 2 leaf springs are mis-matched. This side is shorter than the other side.
We also had to make new brackets for the expansion hinge because of the difference in bolt size.
Lining up the 2 springs required moving the trailer to the patio and leveling it as best we could. we used a straight edge, plumb bob, and levels. We managed to get it pretty close.
The big things that the bow of the 2 leaf springs are the same height and the holes are somewhat lined up.
Next week we will be building the axel and mounting the spindles to it.

2/10/2013

Refurbishing a Trailer Part III

 I obtained a 64 inch section of 2x2x1/4" square tubing. We notched out a section of the square spindle end to accommodate the seam on the inside of the square tubing. the spindle fits in nicely.
 We attached the front hinge for the leaf spring on one side, installed the bushing in the leaf spring and temporarily mounted it on the trailer. I welded the hinge in place after checking that it was as true as I could get.
 The rear hinged and its expansion joint were attached, lined up and clamped in place. Then the bolts removed and the hinge welded in place. The expansion joint is connected at about ~2 degrees over center to prevent it from moving in the wrong direction during a bounce.


 The fully attached Leaf spring.
 We also added gussets to the tonge for extra strength.


2/06/2013

Refurbishing a Trailer Part II

This weekend we Worked on Creating the new brackets for the leaf springs
We had purchased some brass pipe to use as bushings but we ended up only being able to use one set of them. The 2 leaf springs are not the same. The place for the bushings are different sizes and we were only able to get one set in.
 We had to ream them out after pounding them in place.
I had to order a set of steel bushings for the other side as our options were limited. We could try to drill out the spring steel to use the brass bushings we made, but could not find a place that sold the right size drill, and did not have a lathe to turn down the bushings to fit. I ordered steel bushings because I could not find brass ones with the correct (or even close) Inside and outside dimensions.


1/13/2013

Refurbishing a Trailer Part I

Many years ago while out in the desert north of Florence we found an abandoned trailer. That was about 6 or 7 years ago. The trailer had been out there for probably 10 or more years. It was barely half a mile from the nearest dirt road. Someone had loaded it with junk, drove it out there and just left it.

Over time many people had shot the wooden sides full of holes and pack rats had built a nest in it. The tires were flat and it was rather rusty. I would like to show a picture of it but it appears we never took one.

We had thought about dragging it back to Phoenix and rebuilding it, but did not have a way to do so. Recently Chris had bought a trailer and last year he drove out there and picked it up. He took it back to his house and removed the wood and "axle"

and did a bit of clean up of it. This year he brought it over to my house and we have been working on it every weekend.
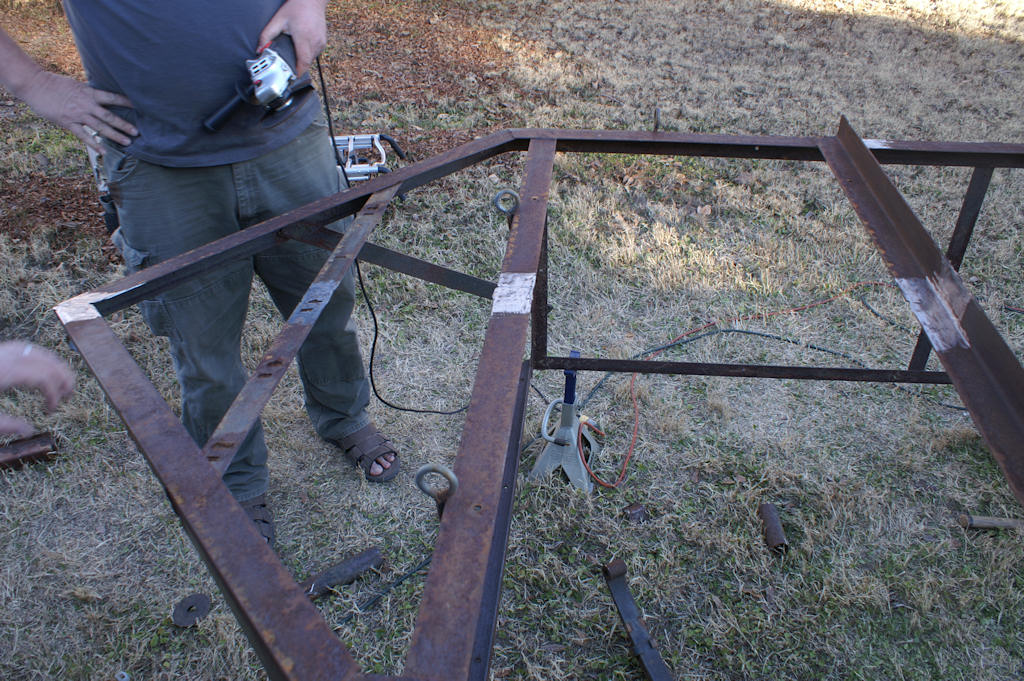
 We began by removing the old brackets for the leaf springs

Then cleaned up the steel.


 The old tongue and the front of the trailer were bent.
So we removed it.

 Cut the Steel near the front of the frame to bend the tongue back up. Then welded a piece of steel in place to strengthen it. We did this on both sides.
 We welded a new piece of 2x2 steel in place of the old tongue.
  
And bolted on a new hitch. 


1/08/2013

You are Defeated Annoying Epson Printer

So I had a simple idea. I had acquired a Trintec wall clock and thermometer from Goodwill for $5. The clock had a face like an artificial horizon (which is stupid).
 
Everyone knows that aviation wall clocks should look like Altimeters (DUH!). however I could not find one on the internets that looked good when printed. SO! I made my own in autocad and converted it to something printable.
It only took about 4 or 5 hours (SHUT UP!). BUT THEN THE FUN BEGAN! Printing it on my laser printer produced shitty results. I drug out my old Epson CX7800 and tried printing with it. OH GREAT! well if you don't print on an epson printer like you know EVERYDAY! it dries out. So I had to spend several hours getting the printheads unclogged.(Magenta still will not print). This is made even more annoying as epson cleans EVERY print head even if they do not have a problem. So I wasted a crap load of ink. I had to go to staples and pick up some more this morning. Then spent several tries getting the printer to print ONLY in black and to do so on the glossy paper I have. See if you tell the printer that you have glossy paper it does not allow you to print in black ink only. So I tricked it by telling it I had thick card stock. Finally after 2 days, untold amounts of wasted paper, and about $80 dollars in ink (I'm not bitter)... BEHOLD!
Trintec has the same one on their site and it only cost $70. SHUT UP JUST SHUT UP!


11/19/2012

No More Thanksgiving

This the second annual reminder that we are NOT doing thanksgiving, and Christmas is on it's way out too. We are tired of them, they are not fun and thanksgiving has nothing to do with thanksgiving anymore, it's all about imposing on people and stuffing your face with food that is beyond boring. Christmas is purely commercial and I never much cared for the "religious" parts of it anyways, since Jesus was NOT born in or even near December.

Both are humbugs.

INB4 "you're a scrooge" STFU!

9/18/2012

Zenith M730 Part II

Well it's done. I got all the caps replaced. I was not able to re-stuff the old multi section cap and ended up putting the new caps under the chassis. Here is a pic with all the new caps. The orange pillow shaped ones and the large striped cans. I forgot to take a picture of the replacement for the selenium rectifier, but you can see most of it in the lower right corner. I installed 2 33ohm 10 amp resistors (in series) in front of the 1n4007 diode to lowr it's voltage output to 130vdc about 5 volts lower than it should be but that is within tolerance.

The only issue with the radio after I finished recapping is that I accidentally hooked the AM loop antenna to the FM antenna connector and Vice-Versa. once that was corrected it works just fine, no re-alignment needed.

Cleaned and lubed all pots and bearings.
Cleaned the FM/AFC/AM switch.
Cleaned most of the Cadmium Sulphide off the chassis.
Cleaned the dust and spider webs out of the case.

Implemented the following safeties:
recapped (of course).
replaced selenium rectifier with a silicon diode.
larger surge resistors
polarized plug
rear interlock keyed for the polarized plug.

1 tube tested bad on my tester but I am debating whether to replace it at this time.