
Radio is done for now. Just a few things left to do. Which may take a while.
6/24/2013
Refurbishing a General Electric C403D Tube Radio Part II
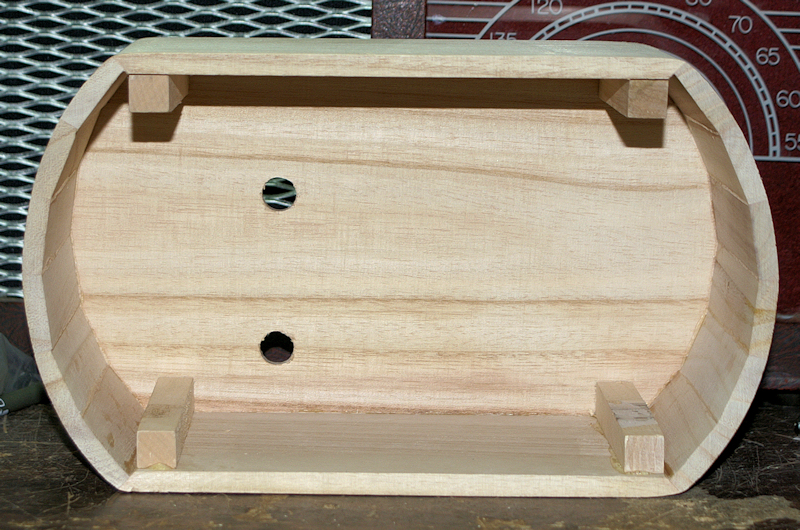
Work is progressing on the little radio. I have the grill on the bottom.

The speaker and speaker cloth are installed.

I located a speaker grill at Ace hardware. It is a brass plated shower drain guard. It was a huge pain to mount. there were 4 small tabs on the back to
hammer down, I had to solder brass screws to the back of the "grill"
which involved scratching up the surface, using acid flux and plumbing
solder since rosin core would not do it. I had to modify the speaker to
match the screw locations. There is the possibility that it could pop
off at anytime since I do not have much faith in it being properly
soldered (we will see). although it is not magnetic it seems to not be
solid brass. When I scratched up the back I uncovered a nickel? colored
metal.

I have attached a home made and artificially aged (with coffee) label on the back plate.

SO! what's left to do?
The transformer.
Better knob and dial.
Dial markings (dependent on dial).
Finish the back
all the above may go slow but the transformer and back will probably be done late this week or early next. Knobs would probably take sometime.
6/21/2013
Refurbishing a General Electric C403D Tube Radio Part I
So a while back I purchased from ebay a radio similar to this:

for parts not working.
Well I got it working but the clock would not keep time, the plastic case was ugly, and I do not like clock radios anyways.
I pulled the guts and gave it a newer better speaker.
Well I got it working but the clock would not keep time, the plastic case was ugly, and I do not like clock radios anyways.
I pulled the guts and gave it a newer better speaker.

I decided to put it in a new cabinet. However it is 108 here and I
had no interest in trying to build a cabinet in the heat. I went to
Micheal's and picked up a small non square box to put it in for $5.00.


I drilled holes in it for the tuning knob and volume.
I temporarily mounted the board in the radio sideways like it was in the
original. I will be drilling 1 or more holes in the bottom of the
cabinet later to get some air flowing over the tubes.

I made a cutout of the speaker so that I could place it correctly. The
tuning dial and volume knob are from the old radio and will probably not
be going on the new cabinet. I found that I needed to move the speaker
over about 3/8" from my initial placement. The speaker hole will be cut
out and some cloth I picked up will go over the speaker, then I will
make a decorative flange to go over the speaker and cover up the speaker
hole.

I had purchased some large beads for the feet and attached them.

I went looking for a prefabbed cutout for the speaker and could not find
anything, both at craft stores and on line. I will have to keep looking
as I do not have the proper tools to make what I want. I did cut out a
hole in the bottom and found a small chrome fan grill to keep probing
fingers out.

I also gave the wood I nice stain. However that uncovered a flaw on the
bottom of the craft box. It has scratches at right angle to the grain. I
had sanded the face (with the grain) but did not see it till it was
stained. Oh well it gives it character.
I have the following completed. I have figured out where to wire the
pilot light. Installed the mp3 input on the board, and put on a thin
coat of spray varnish. Now she needs to dry overnight. When I put the
feet on this time it sits perfectly without rocking.

6/19/2013
Fixing a Consus Eagle USB drive
I have had a couple of these Eagle/Consus External hard drives for a while now and over the years they have given me fits. After a few months of use they start to have problems.

Usually the problem is caused by the the cheap AC adapters failing due to bad capacitors. Today I checked on my servers backups and found they have not been backing up in weeks. NICE! I cracked open the AC adapter and checked the caps and they are all fine... hmmm. I took the drive apart and everything looked ok, but I pulled one of the caps and tested it with my Atlas ESR+ and it showed out of tolerance and rather high internal resistance of 8ohms. So I pulled all the 100uf 16v caps and replaced them. They were all out of spec and had internal resistances as high as 17ohms.

Before finalizing the work I tested the drive and found that everything was working like it should.

So I finalized the repair and will do the same with the other drive I have.
Why would I bother fixing something as inexpensive as a USB enclosure? Because I hate to throw out something perfectly good if I can fix it, and I am cheap.
6/02/2013
Newcomb B-100 Radio Restoration
I recently got 2 Newcomb B-100 Radios off of ebay. Newcomb made radios from the 40's to the 70's (I think) I cannot find much info on the company. Their radios, and other equipment were used mostly in schools. These 2 radios are slightly unusual because they are more "fancy" looking than their other models.

The bottom one in is the older radio and the subject of this post. It was very dusty inside and surprisingly (for it's time) has a transformer.

First thing I had to do was replace all the red beauty capacitors,

With orange drops and 2 of the cpacitors with some Red Audiophile Capacitors. I also installed new electrolytic capacitors (not shown) but left the old multisection cap installed for looks.

I replaced a few out of spec resistors, the power cord, moved the fuse to the back of the unit, and replaced some of the wire that connect to the antenna and speakers. I installed a 3.5mm audio in jack for playing MP3z through the radio. This radio already had a Phono circuit so it was easy to do.

I made new labels to go over the old identification marks stained them with coffee, and covered the hole where I removed the audio out jack.

I need to recover the case and that will be fun as I do not yet have a source for the vinyl cloth to do it.
If anyone has any of the schematics or other documentation for these radios please contact.
If anyone has any of the schematics or other documentation for these radios please contact.
Subscribe to:
Posts (Atom)


